
Today's post is a spin-off of last week's Weekly Bento Round-Up #1. In that post, I promised a tamago-centric feature would be coming soon, so here it is. As was the case with the Sushi Attempts post from a few weeks ago, my skills in the realm of tamago are extremely limited, and were, until just over a week ago, completely nonexistent. Thankfully, both Lunch in a Box (my previously-mentioned go-to resource for Bento lunch ideas) and the extremely helpful About.com have tutorials for making your own tamago, or Japanese rolled egg omelet, at home. Tamago is technically called tamagoyaki, but more casually known as tamago. So if you want to do further research on making tamago, that additional search term might be useful for you to keep in mind.
Both of the above-mentioned how-to's have their respective merits. The LiaB article is extremely useful in a "oh, maybe this won't be so hard after all" capacity, as it shows how one can very quickly throw together an impressive serving of tamago. The shortcut discussed on that site--only rolling the second omelet--would be a serious time-saver too. I ended up using the About.com article for my own tamago-making, though, because I usually find it more useful to try and execute the harder, more traditional version of a recipe rather than taking a shortcut, at least the first time or two that I make it. I find that this helps me to better understand how the dish in question, and others like it, works, in terms of its ingredients, cooking techniques, and resultant flavor profile.
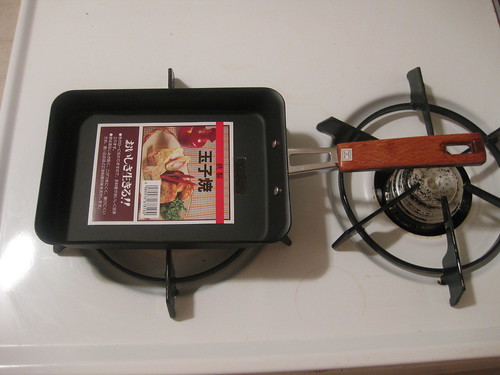
With either recipe, you won't absolutely need a makiyakinabe, or tamago pan, but if you can get one (they're relatively easy to find at Asian/Japanese specialty stores for under $10), you'll have an easier time making this dish. You're also going to need sugar, pre-packaged powder for making dashi stock, and cooking spray (or whatever you'd like to use to keep the tamago from sticking to the pan).
The basics of tamago-making can be boiled down pretty simply, provided you've boiled up your dashi stock and have your sugar at the ready. Whisk those with 2 beaten eggs if, like me, you're using a small tamago pan, or 3-4 eggs if you've got a medium-size makiyakinabe. Pour 1/2 the egg mixture onto the bottom of the greased pan with your burner set at medium-high, and allow your first thin omelet to cook 3/4 of the way through.
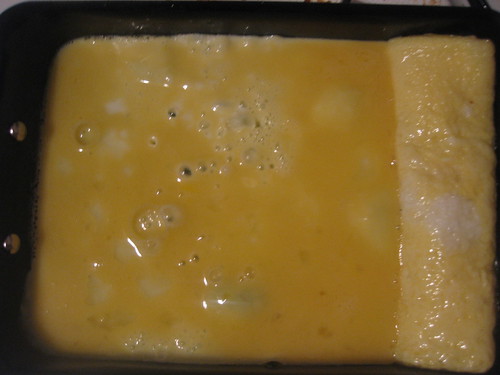
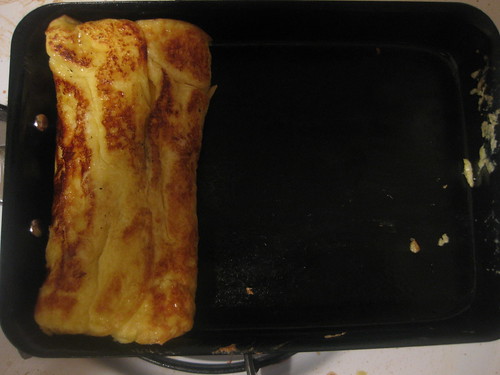
At this point, if you're extremely skilled with Japanese kitchen chopsticks, you can roll up your first omelet using those, but if not (in my case), just use a spatula or whatever kitchen tool you like--small tongs might work--and roll it up. While you're making the second omelet, the first one, in its newly-rolled form, will finish cooking through. Speaking of which, to get your second omelet going, re-grease the pan (if any part of the egg sticks to the pan it's going to be a little bit of a logistical nightmare for you), then pour the remaining egg in while lifting up the first rolled omelet, so the newly-poured egg gets under your rolled omelet and they stick together.
When the second omelet is almost done cooking, roll the whole thing back in the other direction, starting with the first rolled omelet, in order to achieve a kind of snowball effect. Remove to a plate, let cool, and serve. Enjoy your tamago!

Thanks for stopping by Beach City Cooking, and I'll see you all tomorrow for another edition of Wednesday Brunch. Have a great night, and stay cool!
http://img44.imageshack.us/img44/4135/downsize.jpg
ReplyDeleteWell, my first attempt at this didn't go very well. I accidentally put in some rice vinegar instead of mirin and I didn't have any dashi stock. So it ended up very thin and stayed watery after cooking. Plus the first omelette was too small/the second was massive. But it turned out ok. I'll make sure to be a little more precise with my ingredients and get a tamago pan next time. I was debating between this and french toast; guess I should have gone with french toast!