
Growing up, my favorite girl scout cookie--and the favorite of many others, I suspect--was the Thin Mint, that crispy, peppermint-infused treat that always appeared to be packaged with a free magic trick: eat one cookie, watch the rest disappear before you know it. I always had a soft spot for the peanut butter & chocolate Tagalong, though, and this interest was rekindled recently by a purchase of Edy's ice cream. Edy's, which is usually $6 a container, was on sale for 1/2 its typical asking price, so we picked up a pretty cool variety with vanilla ice cream and crushed-up Tagalongs, kind of a take off of traditional cookies'n'cream ice cream. The chocolate and peanut butter-y bits jived unsurprisingly well with the smooth vanilla ice cream. I say "unsurprisingly" because how could chocolate, peanut butter, and ice cream do anything but great things together?
So, it was with great pleasure--and a renewed love for Tagalongs--that I came across Baking Bites' recipe for homemade Tagalongs just a few days ago. I've had pretty mixed results with various websites' baked goods recipes before--just the nature of the internet, really--but Baking Bites has never steered me wrong. As such, the results were pretty delicious, and wonderfully similar to the original cookie. The recipe on the site makes about three dozen cookies, while my baking yielded just over two dozen. Regardless, you're going to have a lot of cookies on your hands. So it should come as no surprise that I recommend that if you have an ice cream maker--or even just vanilla (or chocolate) ice cream on hand--I suggest you seriously consider crushing up some of your cookies and mixing them with ice cream, because Edy's was absolutely onto something when they did so.
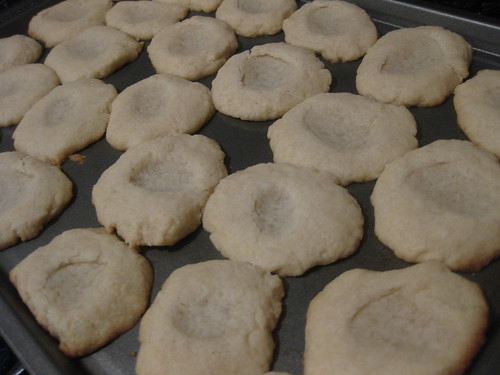
The recipe is a reasonably simple one that starts with making shortbread cookies. As soon as the cookies come out of the oven, make a thumbprint-sized groove in them before they cool and harden too much. They're already going to be delicious at this point, but if you hold on a little while longer, they'll be even better. Such is the burden of a dessert maker, trying their hardest not to eat the results of step 1 before moving onto step 2. It's a tough job, but someone's got to do it.
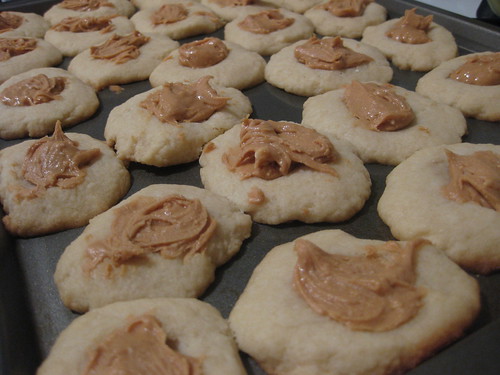
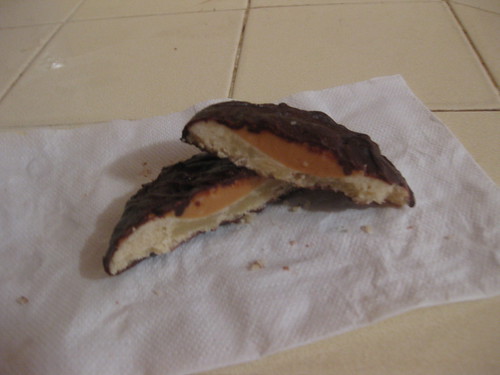
A teaspoonful of the peanut butter mixture fits perfectly in the depression of each cookie. Wait for the cookie and peanut butter mixture to cool completely before moving onto the third and final step. These cookies aren't difficult to make, but they are time-consuming. Rest assured it'll all be worth it in the end when you're biting through layers of chocolate coating, lighter-than-air peanut butter, and dense, satisfying cookie. Yumsville, express train leaving later this evening. All aboard.

The final step consists of dipping your cookies into melted chocolate and allowing them to cool. Try to occupy yourself while the chocolate cools down, and think fondly of the great cookie-eating experience you're about to embark upon.
Thanks for stopping by Beach City Cooking, and I'll see you all tomorrow for another edition of Home Plate, where I make dishes from my favorite restaurants at home. Have a great night, and stay cool!
No comments:
Post a Comment